Trezor.io/Start® | Trusted Way To Safeguard Your Crypto Investments.®
As the world of cryptocurrency continues to expand, so does the importance of securing digital assets. Trezor®, a pioneer in hardware wallet solutions, offers a trusted way to safeguard your crypto investments. Whether you’ve just purchased your first Trezor device or you're upgrading from another wallet, the journey starts at one place: Trezor.io/Start.
In this guide, we’ll walk you through everything you need to know about getting started with your Trezor hardware wallet, from initial setup to securing your recovery seed.
What Is Trezor?
Trezor® is a hardware wallet developed by SatoshiLabs, designed to securely store your cryptocurrency offline. It offers a layer of security far beyond software or exchange wallets by keeping your private keys isolated from potential online threats like malware and phishing.
Two main models are available:
- Trezor Model One – A trusted entry-level device.
- Trezor Model T – A premium wallet with a color touchscreen and enhanced features.
Step 1: Visit Trezor.io/Start®
The first and most crucial step is to navigate to https://trezor.io/start. This official setup portal ensures you’re downloading authentic firmware and accessing accurate instructions.
Avoid third-party links and always verify the site URL. Scammers often create fake setup websites that attempt to steal your recovery phrase.
Step 2: Connect Your Trezor Device
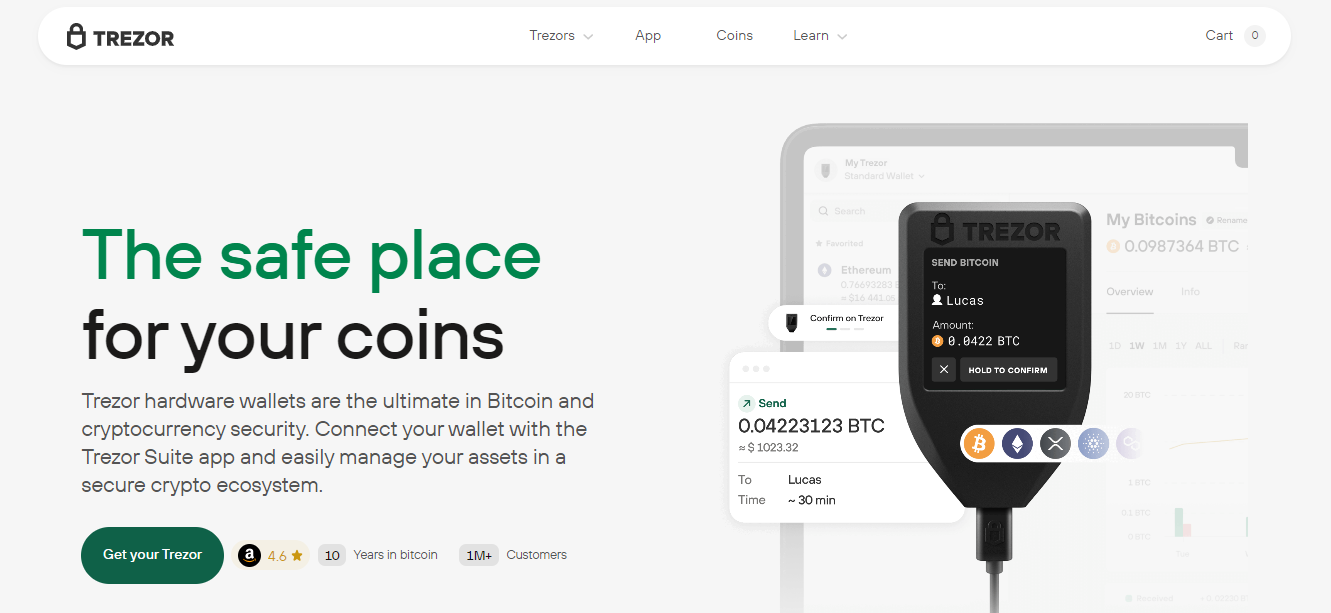
Using the USB cable provided, plug your Trezor device into your computer. Once connected, follow the on-screen instructions. If this is your first time using the device, it may ask you to install Trezor Suite, which is the official desktop and web app for managing your crypto.
Install Trezor Suite:
You can download Trezor Suite for your operating system (Windows, macOS, or Linux) via Trezor.io/Start. This application will guide you through the entire wallet initialization process and allow you to access your portfolio securely.
Step 3: Install Firmware
Your Trezor device does not come preloaded with firmware to ensure maximum security. Once connected and Suite is launched, you will be prompted to install the latest firmware.
Follow the prompts carefully and do not disconnect the device during this process. The installation only takes a few minutes.
Step 4: Create a New Wallet
After the firmware is installed, you’ll be asked to create a new wallet or recover an existing one.
Choose “Create new wallet” if you're starting fresh. Your device will then generate a 12 or 24-word recovery seed — the most critical part of your crypto security.
Backup Your Recovery Seed:
- Write the seed phrase down on the provided recovery card or a secure paper.
- Never take a photo or save it digitally.
- Store it in a safe, offline location.
- Anyone with access to this seed can access your crypto funds.
This seed is the only way to recover your wallet if your device is lost or damaged.
Step 5: Set Up a PIN
To protect the device itself, you’ll be prompted to choose a PIN code. This PIN will be required each time you connect your Trezor wallet.
Tips for a secure PIN:
- Avoid easy combinations like “1234.”
- Never share your PIN with anyone.
- Enable the additional passphrase protection if you want to add another layer of security.
Step 6: Add Accounts and Transfer Crypto
With your wallet initialized, you can begin adding crypto accounts (like Bitcoin, Ethereum, Litecoin, etc.) through Trezor Suite. The dashboard allows you to:
- Monitor balances and transactions
- Receive funds
- Send funds securely
- Swap or buy cryptocurrencies via integrated services
The Trezor Suite interface is intuitive and privacy-focused, ensuring a user-friendly experience for both beginners and advanced users.
Security Tips for Trezor Users
- Always verify the address on your Trezor screen before sending funds.
- Use passphrases for extra security.
- Regularly update your Trezor firmware to benefit from the latest security patches.
- Avoid using your wallet on shared or public computers.
Why Choose Trezor?
Trezor® is more than a wallet; it’s a long-term investment in the safety of your crypto. With open-source software, transparent development, and robust community support, it sets the gold standard for digital asset protection.
Unlike custodial services or hot wallets, Trezor gives you full control and ownership over your private keys. This means only you — and no third party — can access your coins.
Final Thoughts
Starting with Trezor® at Trezor.io/Start® is a smart move for any crypto investor who values security. With a clear setup process, strong user support, and industry-leading security features, Trezor helps you take control of your digital wealth with confidence.
Whether you're holding Bitcoin, Ethereum, or dozens of other supported coins, your journey to secure crypto storage begins right here — with Trezor.
Made in Typedream